

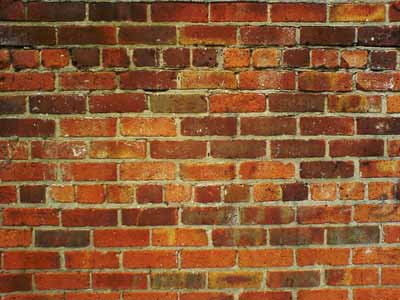
Open the photo with the textured surface.
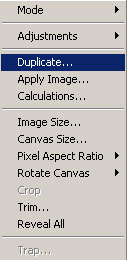
Go to Image -> Duplicate
A new window will come up asking you to give the duplicate image a name (wall copy)
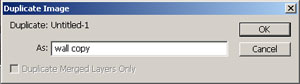
Now save the duplicate image as wall copy.psd. Close the duplicate image.
Back at our original Image and paste in new layer photo of your favorite singer.

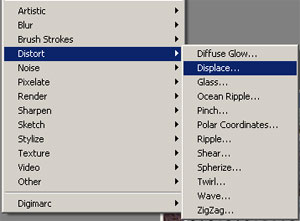
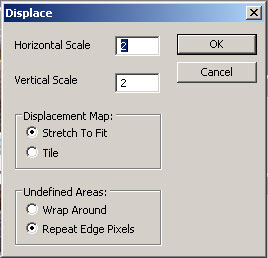
Go to Filter->Distort->Displace
You can experiment with the settings to find the ones that better suit you needs.
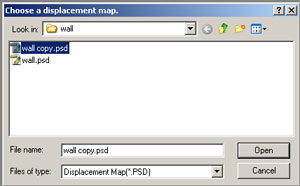
A window will come up asking you to select a displacement map. Find and select the duplicate image that you created at the start of the tutorial (“wall copy.psd”) and press open.
Here is the result of the displacement filter.

Change the layer blending mode. I used “Hard Light”. When using different colors of the background layer is different than the one I used for this tutorial, other blending modes may work as well:

Ok now you are going to have to experiment here.
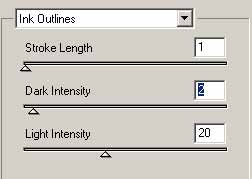
With a lighter image you are gonna wanna go to Filter>Brush Strokes>Ink Outlines:
With a lighter image you are gonna wanna go to Filter>Brush Strokes>Ink Outlines:
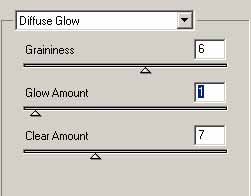
With a darker image you are gonna wanna go to Filter>Distort>Diffuse Glow:
My final results:


Now add text graffiting I suggest downloading this font.
Add your text with color #FFE600.
Rasterize and appply the same effect with Filter->Distort->Displace.
Set the layer blending mode to “Overlay”.
Go to Blending Options>Stroke
Size: 2px
Position: Outside
Blend Mode: Normal
Opacity: 100%
Fill Type: Color
#8B2828
Position: Outside
Blend Mode: Normal
Opacity: 100%
Fill Type: Color
#8B2828
My results:
Share On


Tidak ada komentar:
Posting Komentar