In this tutorial, you will learn how to create a really smooth looking 3D text in any version of Photoshop. This tutorial will create the illusion of 3D without the use of any 3D programs, we will only use the raw power of Photoshop.
Not only will we create it. you will also learn some simple technique
to decorate the type to make it pop! Although this technique is limited,
it can be very useful for someone who cannot afford to buy a 3D
program.
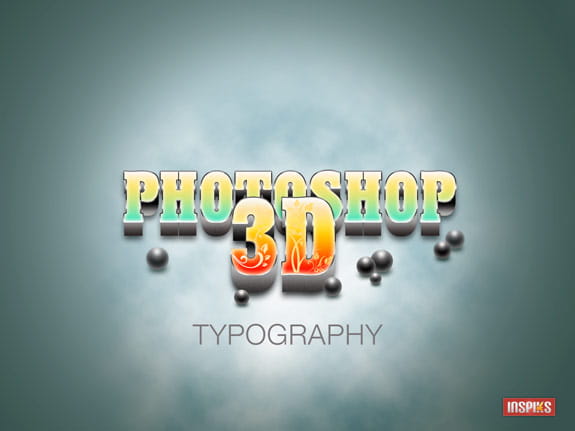
Photoshop 3D by loswl – Final Image
Skill Level
IntermediateResources
Hansen Font From FontStockFloral Brush by jaaaiiro From Brusheezy!
Step 1:
Create a new document in Photoshop, 1600×1200 pixels, 300dpi (for printing), RGB color. We begin with a radial gradient, by double clicking the layer to activate the Layer Styles menu, then apply a Gradient Overlay. Here are the exact color codes:Foreground Color – #f2f5f6
Background Color – #c8d7dc
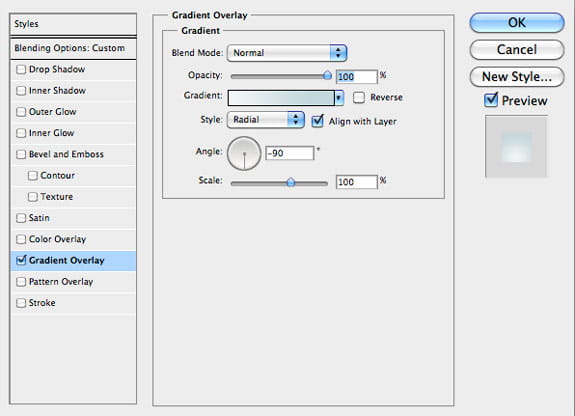
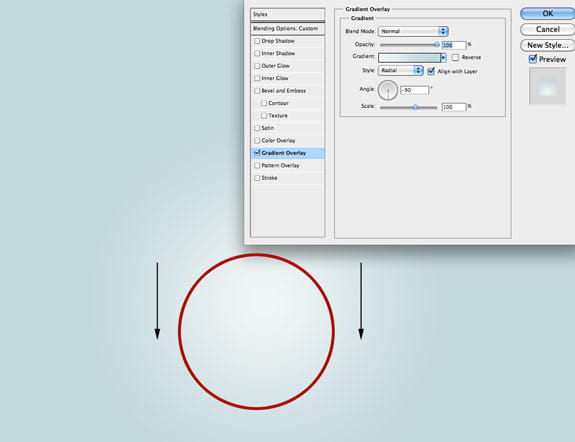
Before you press ok to apply the gradient overlay, move the (center white area ) a little to the bottom of the document by dragging the gradient down with the Move Tool. See image below.
Step 2:
Create a soft cloud for the background. Create a new Layer and fill it with black using the paint bucket then create a Difference Cloud by first clicking “D” on your key board to make the foreground color Black and the background color White; then go Filter > Render > Difference Cloud.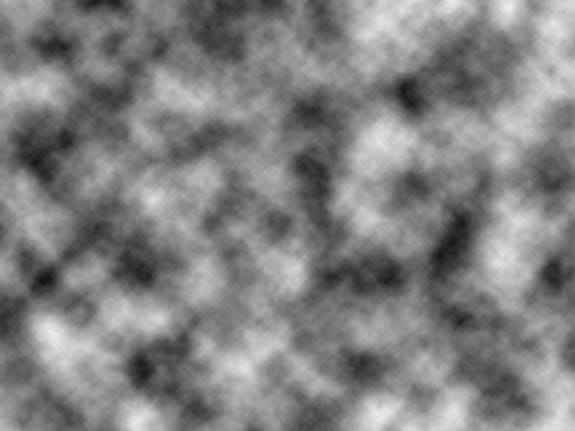
Apply an Overlay to the Difference Cloud Layer, then use a large soft brush to erase the outer edges.

Darken the edges of your background by creating a vignette, Create a new layer, then create a radial Transparent Gradient.
Foreground Color #ffffff
Background Color #19271f
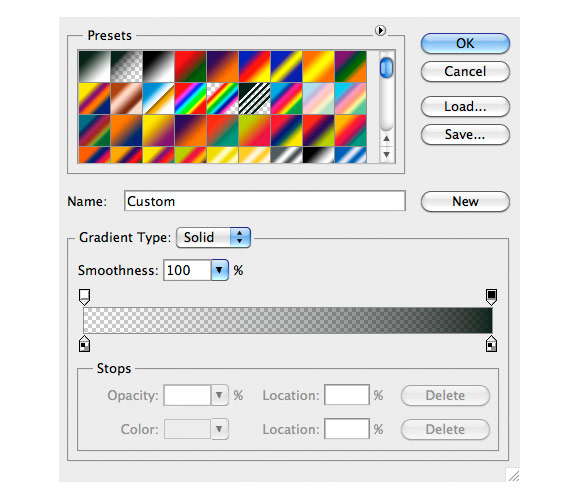
Click on the Gradient Tool and select and apply the Radial Transparent Gradient by dragging from the center of the document to the left edge. Erase the center of the gradient with a large soft brush. Set the layer to 60% Opacity.

Step 3:
Create your type, use a thick font like Hansen. ( The effect does not work well with thin fonts)
Step 4:
Ctrl Click (pc) or Command () Click (mac) the text layer in the layer palette to make a selection of the type.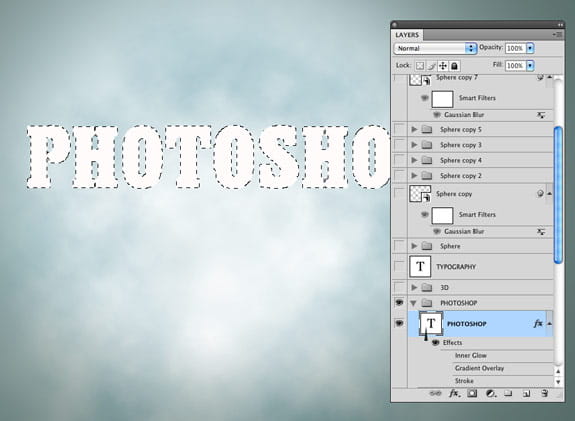
After the selection is made. Create a new layer below the text layer and fill the selection with black. Now we will duplicate the pixels of the new layer downwards, to give the illusion of a 3D extrusion, here is how it is done.
- While the new black layer is still selected, select the Move Tool (very important)
- Press Alt + Shift (pc) or Option + Shift (mac) and tap the downwards Arrow Key four times until you have something that looks like the image below when you are done.
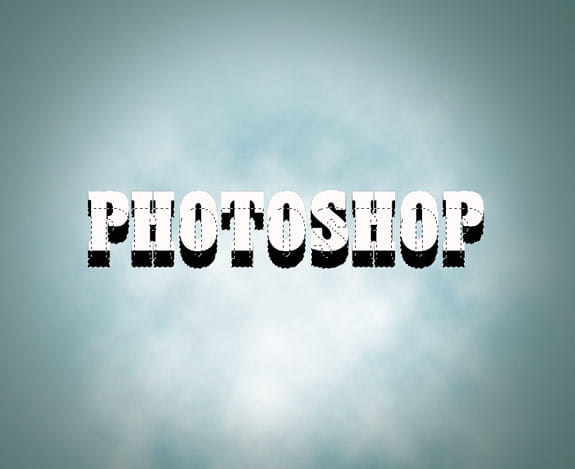
Apply a Gradient Overlay to the new black layer
Hex Colors
- # 615f5f
- #b3b3b3
- #454545
- #ececec


Step 5:
We will now give the layer a little bit of texture. Duplicate the layer and turn it into a Smart Object (older Photoshop versions can flatten the layer). Add 7.00% noise to the layer. Filter > Noise > Add Noise. Then Add a Soft Light Layer Style to blend it in nicely.
Step 6:
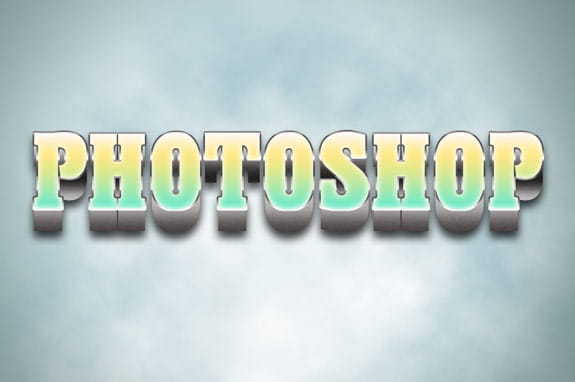
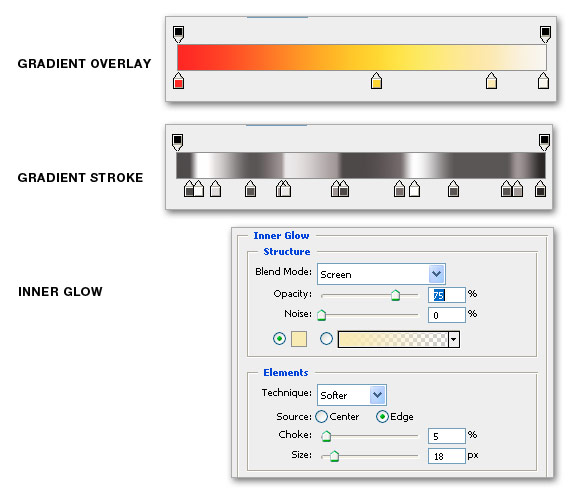
Add some Layer Styles to the original text on top, to make it pop! Double click the text layer in the layer options panel to activate the Layer Styles options. Apply the options below.- Gradient Overlay (Hex: #99e8cb # f5e78c #fcf7f4)
- Gradient Stroke (Fill Type Gradient – Hex: #4e4c4c #ffffff #595757 #9b9696 #2d2b2b)
- Inner Glow (Hex #f9dbdb)
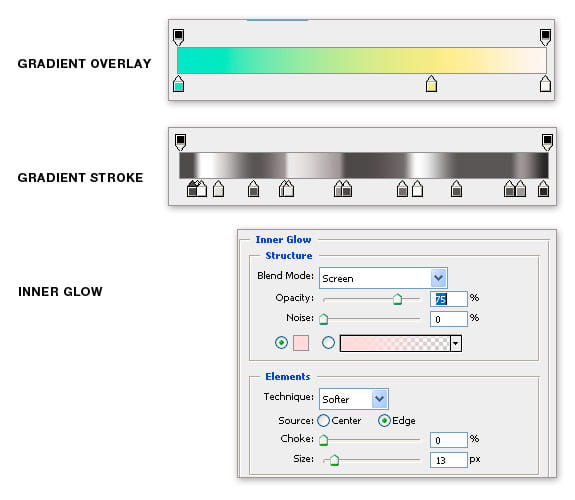
Step 7:
Create a new text named 3D and place it above all the previous layers, repeat steps 3 to 6, Apply the Styles below for Step 6- Gradient Overlay (Hex: #d92525 # f8d04a #f6e6b5 #f9f7f1)
- Gradient Stroke (Fill Type Gradient – Hex: #4e4c4c #ffffff #595757 #9b9696 #2d2b2b)
- Inner Glow (Hex #f5e8b6)

Step 8:
We will now add a little more decoration to the 3D lettering, with brushes. Ctrl Click (pc) or Command () Click (mac), the (3D) text layer in the layer palette to make a selection of the type.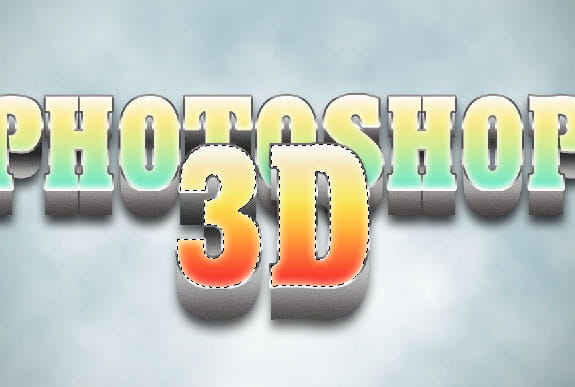
Create a new layer above the (3D) layer, while the selection is still activated. ,Select the Paintbrush Tool and use one of the Floral Brush From Brusheezy, reduce the pixel to about 170 pix and start painting withing the selection, I used a white foreground color when painting. your result should look something like the image below.
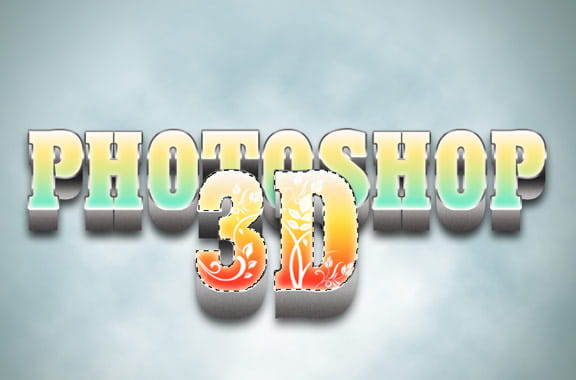
Apply a Gradient Layer Style to the floral layer:
Hex Colors: #fbfbfa #f6e6b5 #fcd967

Step 9:
Now we we solidify the 3D illusion by placing some 3D Spheres around the type. Use the- Ellipse Tool (u) with the
- Shape Layer option selected. (This option allows scaling of the circle without destroying the pixels)
- Hold Shift and draw a perfect circle.
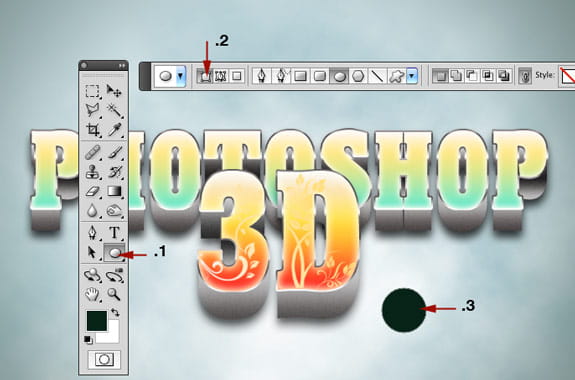
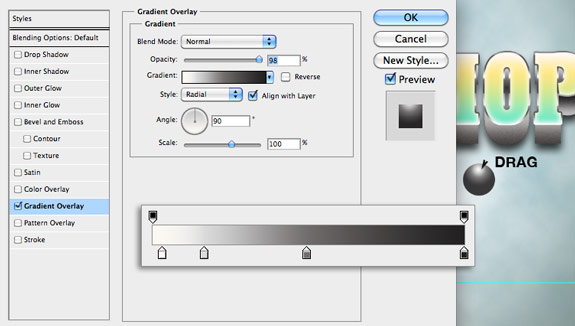
Apply a Gradient Overlay to the circle and drag the lightest area to the top of the circle, like the image below.
Hex Numbers: #f9f7f1, #d9d9d9 #6f6d6d #262525
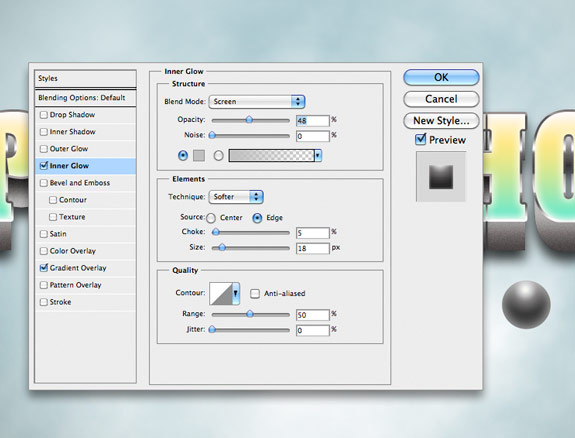
Apply a Inner Glow, Hex Color #bebebe
Step 10:
Add a drop shadow to the sphere by making a new layer underneath the sphere, draw a circular selection and fill it with black, blur the layer and lower the opacity. Group the sphere and the shadow, then make duplicates. For variety you can scale and duplicate the grouped sphere and shadow, I also flattened some of the groups and blurred them to add depth to the scene.
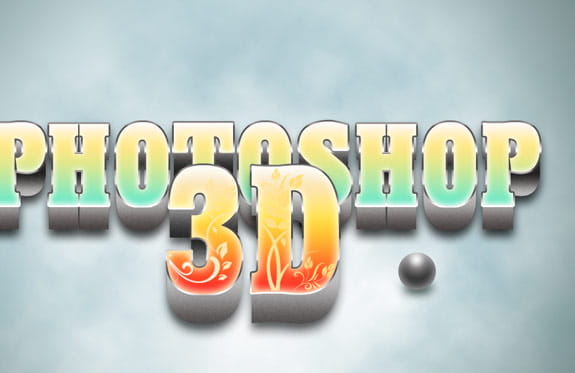
Final Image

Photoshop 3D by loswl - Final Image


pak tyo, apa gag ada translatenya nih????
BalasHapuswah maaf ya
Hapusbelum ada yang versi Indonesia